Applicable XR devices This guidance helps you build experiences for these types of XR devices. [Learn about XR device types →](https://developer.android.com/develop/xr/devices.md.txt)  Display Glasses [](https://developer.android.com/develop/xr/devices.md.txt#audio-display) [Learn about XR device types →](https://developer.android.com/develop/xr/devices.md.txt)
In Jetpack Compose Glimmer, the [`TitleChip`](https://developer.android.com/reference/kotlin/androidx/xr/glimmer/TitleChip.composable.md.txt) component is a non-interactive
component that provides brief context or labeling for associated content, such
as a [`Card`](https://developer.android.com/reference/kotlin/androidx/xr/glimmer/Card.composable.md.txt) or a [`GlimmerLazyColumn`](https://developer.android.com/reference/kotlin/androidx/xr/glimmer/list/GlimmerLazyColumn.composable.md.txt).
Use title chips for concise information like a short title, a category name, or
a status indicator. Normally, you should place title chips above the content
they describe to establish a clear structural relationship.
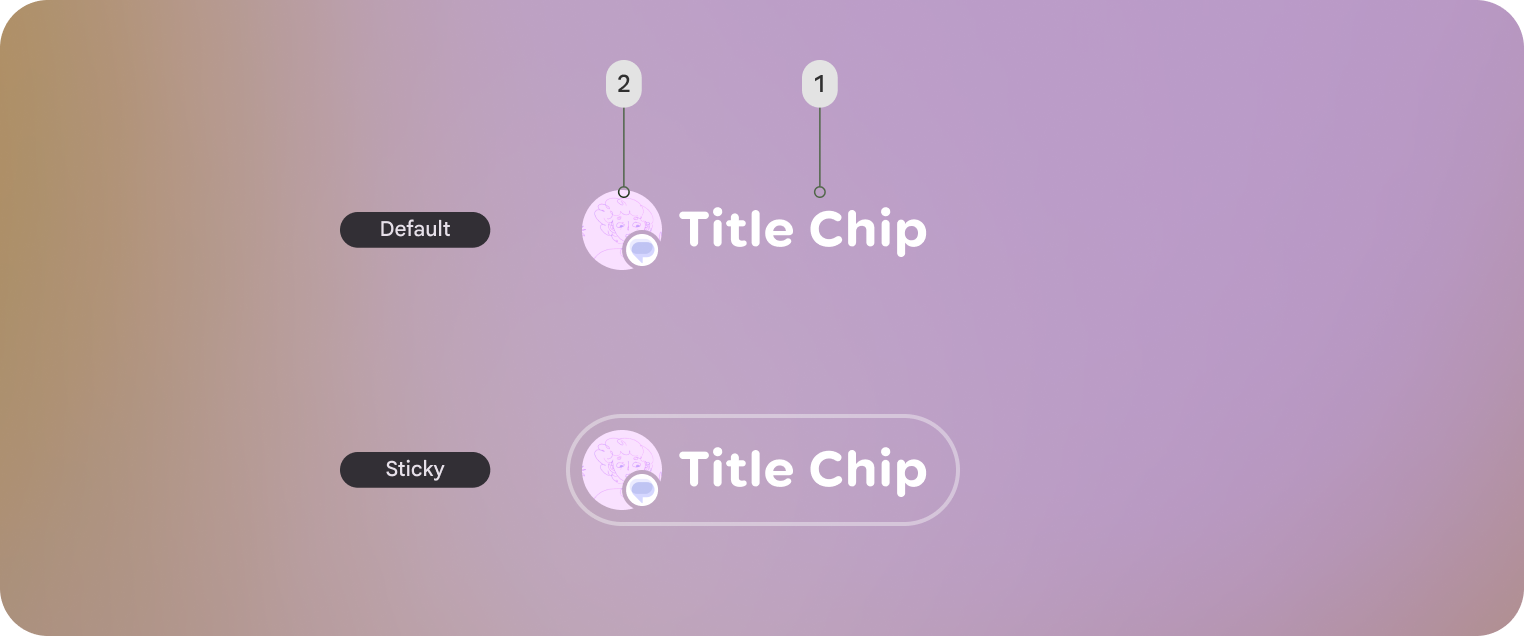 **Figure 1.** An example of a default style title chip and sticky title chip in Jetpack Compose Glimmer. Each title chip has a label (1) and an optional leading icon or entity (2).
## Basic example: Create a short title chip
The following code creates a basic title chip:
```kotlin
@Composable
fun BasicTitleChipSample() {
TitleChip { Text("Messages") }
}
```
## Basic example: Create a title chip with an icon
The following code creates a title chip with an icon:
```kotlin
@Composable
fun TitleChipWithIconSample() {
TitleChip {
Icon(FavoriteIcon, contentDescription = "Favorite")
Text("Favorites")
}
}
```
## Example: Create a title chip with a card
To use a title chip with another component, place the title chip
[`TitleChipDefaults.associatedContentSpacing`](https://developer.android.com/reference/kotlin/androidx/xr/glimmer/TitleChipDefaults.md.txt#associatedContentSpacing()) above the other component in
the composable. The following code creates a title chip with a card:
```kotlin
@Composable
fun TitleChipWithCardSample() {
Column(horizontalAlignment = Alignment.CenterHorizontally) {
TitleChip { Text("Title Chip") }
Spacer(Modifier.height(TitleChipDefaults.associatedContentSpacing))
Card(
title = { Text("Title") },
subtitle = { Text("Subtitle") },
leadingIcon = { Icon(FavoriteIcon, "Localized description") },
) {
Text("Card Content")
}
}
}
```
### Key points about the code
- The title chip is centered horizontally, which is the usual alignment for a title chip placed above a card.
- The [`Spacer`](https://developer.android.com/reference/kotlin/androidx/compose/foundation/layout/Spacer.composable.md.txt#Spacer(androidx.compose.ui.Modifier)) has a fixed height to provide the right amount of vertical spacing between the two components. This is defined using [`TitleChipDefaults.associatedContentSpacing`](https://developer.android.com/reference/kotlin/androidx/xr/glimmer/TitleChipDefaults.md.txt#associatedContentSpacing()).
- Uses an optional `leadingIcon` to add additional visual context before the text content.
- The title chip automatically uses the [`caption`](https://developer.android.com/reference/kotlin/androidx/xr/glimmer/Typography.md.txt#caption()) style for its text.
- The title chip isn't interactive. If you need a clickable label, use a [`Button`](https://developer.android.com/reference/kotlin/androidx/xr/glimmer/Button.composable.md.txt) or another interactive component.