Applicable XR devices This guidance helps you build experiences for these types of XR devices. [Learn about XR device types →](https://developer.android.com/develop/xr/devices)  XR Headsets [](https://developer.android.com/develop/xr/devices#xr-headsets)  Wired XR Glasses [](https://developer.android.com/develop/xr/devices#xr-glasses) [Learn about XR device types →](https://developer.android.com/develop/xr/devices)
The **Device Manager** dashboard in the [Android XR Engine Hub](https://developer.android.com/develop/xr/engine-hub)
gives you a centralized interface to install and test builds, toggle runtime
perception permissions, execute ADB commands, filter real-time logcat streams,
and adjust device configuration toggles without switching to a terminal.
Before using the **Device Manager** tools:
1. Connect your Android XR device to your workstation with a USB-C cable.
2. Make sure that you've enabled [developer options](https://developer.android.com/studio/debug/dev-options#enable) and [USB
debugging](https://developer.android.com/studio/debug/dev-options#Enable-debugging) on your device.
3. Select your device from the drop-down menu at the top of the Android XR Engine Hub.
## Sideload an APK
You can install local `.apk` builds directly onto your connected Android XR
device from the **Device Actions** card without running `adb install` from the
command line:
1. In the left navigation sidebar of the Android XR Engine Hub, select **Device Manager**.
2. In the **Device Actions** card, click **Sideload APK**.
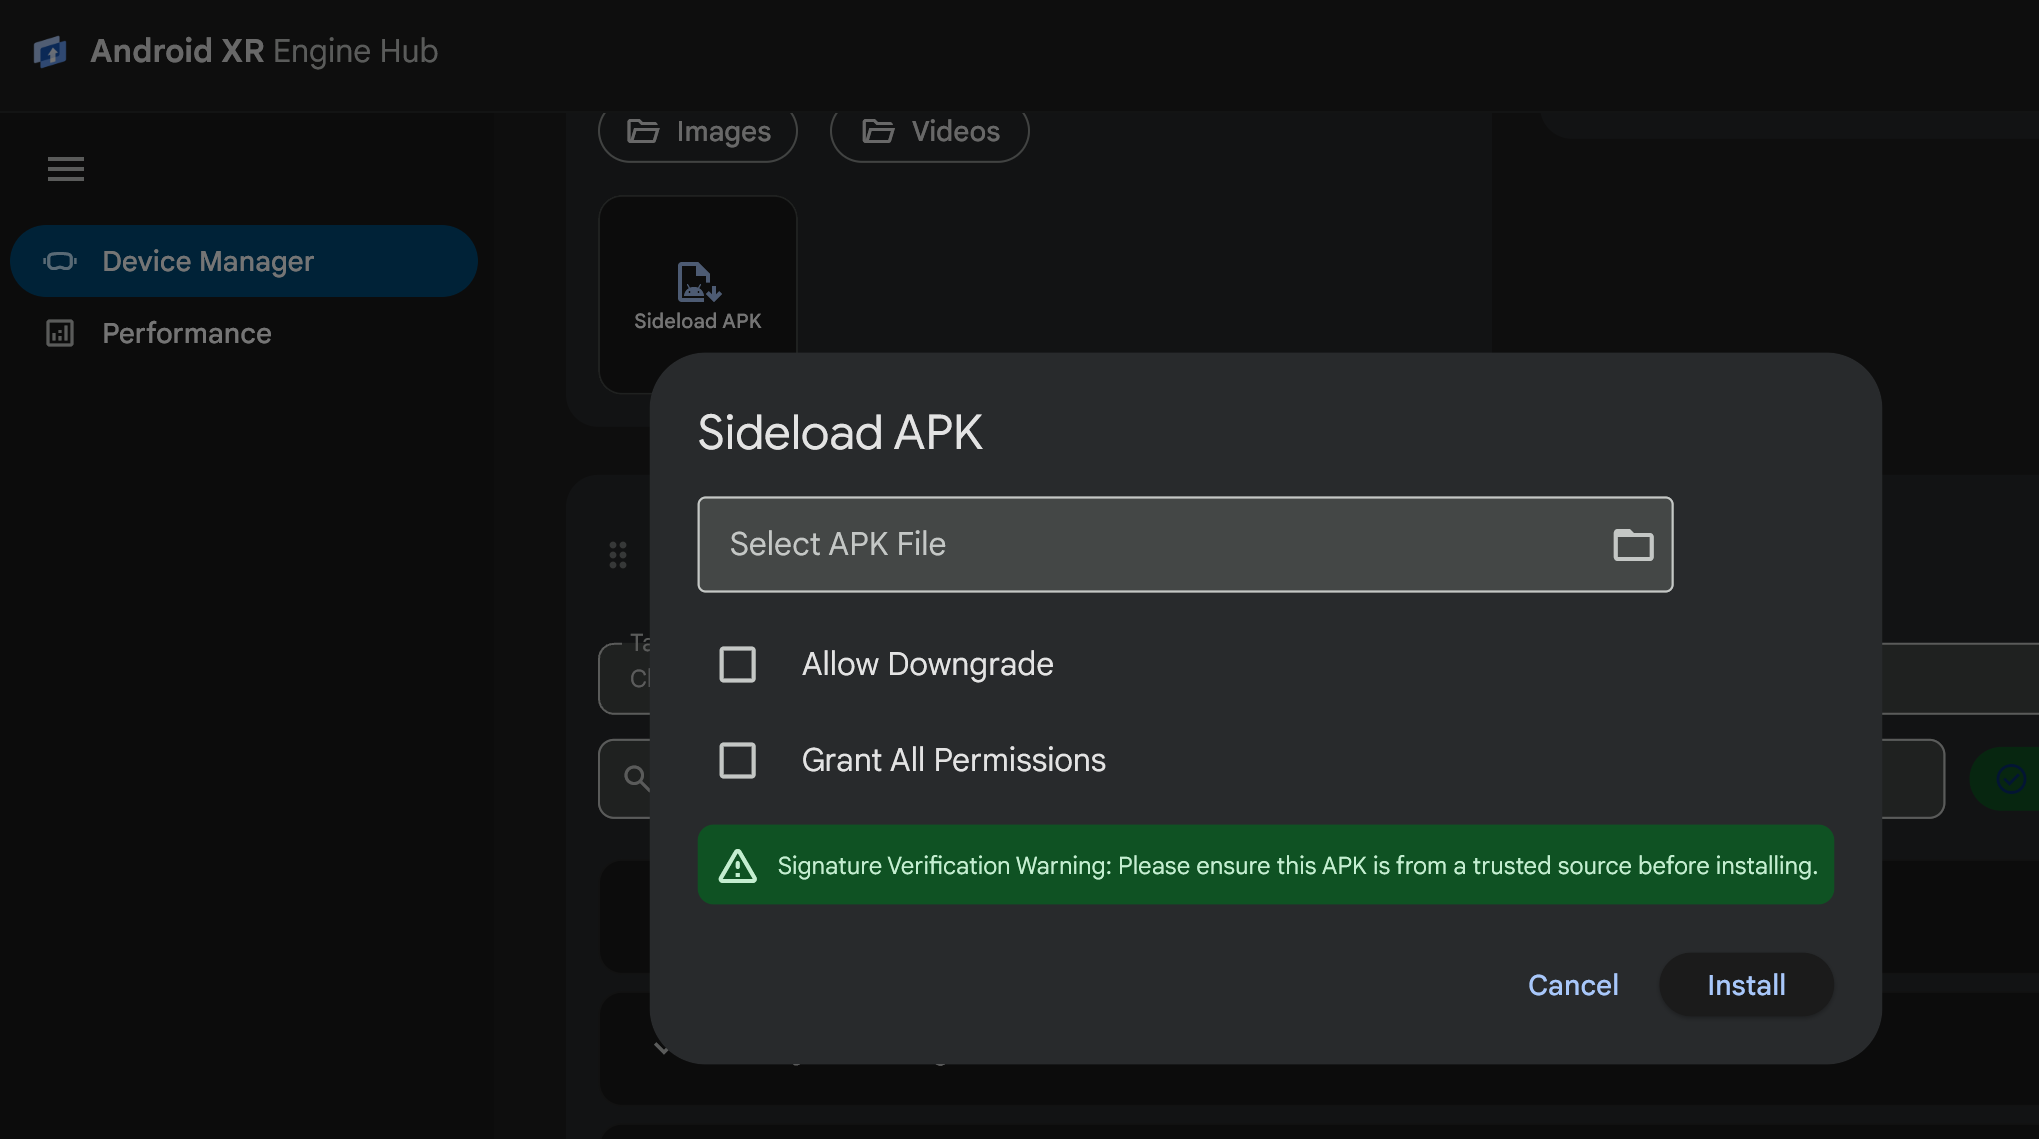
3. In the **Sideload APK** dialog, enter the path to your `.apk` file in the
**Select APK File** field, or click the folder icon (**Browse APK File** ) to
choose a `.apk` file from your workstation.
4. Configure optional installation flags as needed:
- **Allow Downgrade** : Passes the `-d` flag to allow installing an older version code over an existing installation of the app.
- **Grant All Permissions** : Passes the `-g` flag to automatically grant all runtime permissions declared in the app manifest upon installation.
> [!NOTE]
> **Note:** The target APK must be signed with the same certificate as any previously installed version of the package on the device, or the installation doesn't succeed.
5. Click **Install**. The dialog displays installation progress and notifies
you when the package is installed.
## Manage feature permissions
Testing XR perception features often requires switching between granted and
denied permission states. The **Feature Permissions** card lets you inspect and
toggle Android XR capability groups and granular runtime permissions in real
time for any installed package:
1. In **Device Manager** , locate the **Feature Permissions** card.
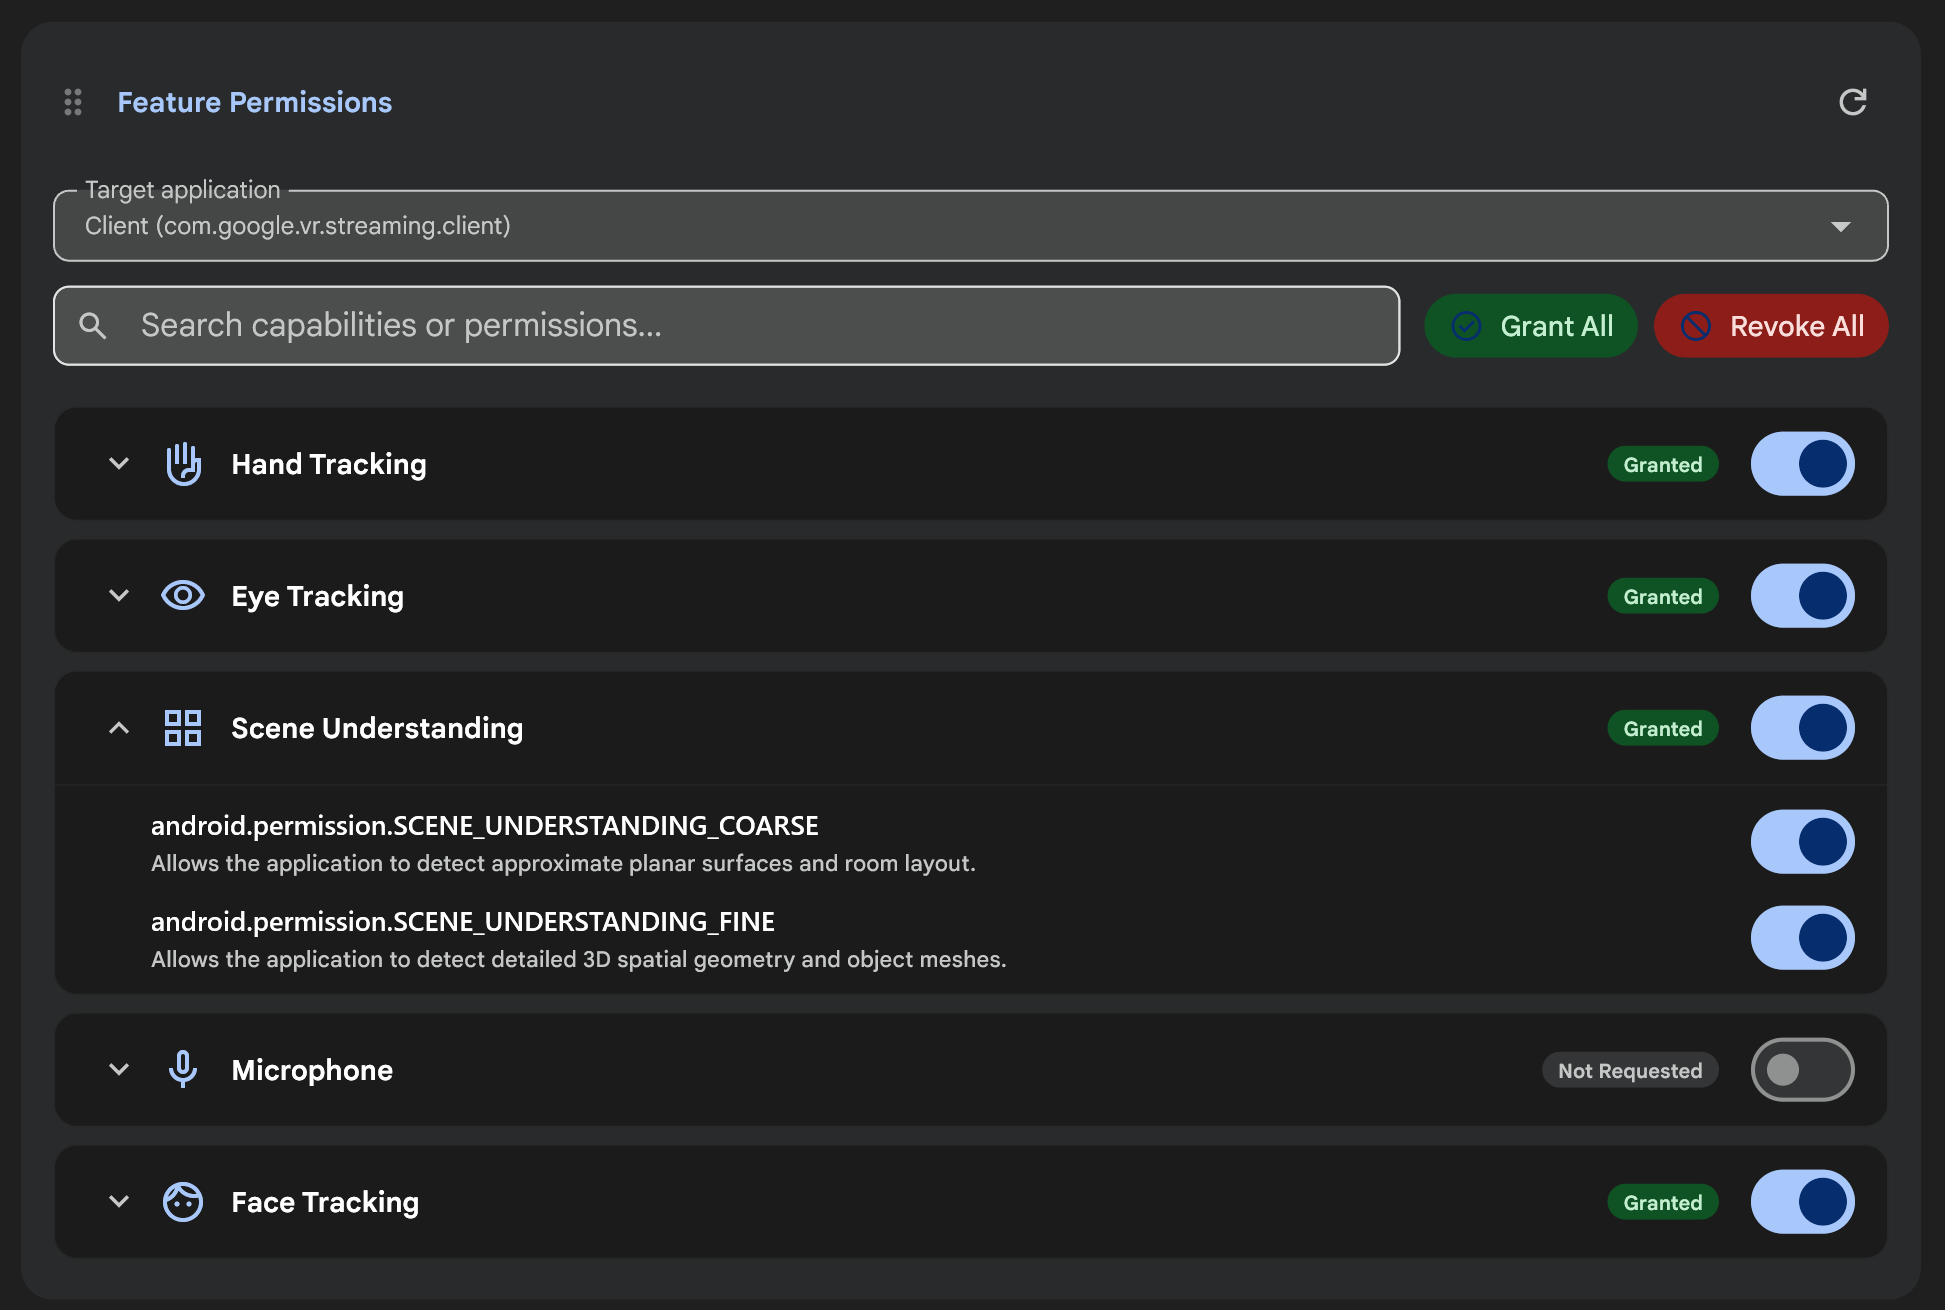
2. From the **Target application** drop-down menu, select the installed app
whose permissions you want to manage (or click the **Refresh** icon to
reload the package list).
3. Review the permission status badge (**Granted** , **Denied** , or **Not
Requested**) for each Android XR capability group:
- **Head Tracking**
- **Hand Tracking**
- **Eye Tracking**
- **Spatial Anchors**
- **Scene Understanding**
- **Camera**
- **Microphone**
- **Face Tracking**
4. Modify permissions for the selected app using any of the following controls:
- **Batch actions** : Click **Grant All** or **Revoke All** to grant or revoke all requested permissions for the selected app at once.
- **Capability toggle**: Use the toggle switch on a capability row to grant or revoke all permissions in that capability group.
- **Granular permissions** : Click the expand arrow on a capability row (for example, **Scene Understanding** or **Eye Tracking** ) to inspect and toggle individual Android permission strings such as [`android.permission.SCENE_UNDERSTANDING_COARSE`](https://developer.android.com/develop/xr/permissions#scene_understanding_coarse) or [`android.permission.SCENE_UNDERSTANDING_FINE`](https://developer.android.com/develop/xr/permissions#scene_understanding_fine).
- **Search** : Enter a capability name or permission string in the **Search
capabilities or permissions...** field to filter the list.
See [Understand permissions for XR](https://developer.android.com/develop/xr/permissions) for more details on Android
XR runtime permissions.
## Run ADB commands and save shortcuts
The **ADB Commands** card lets you run arbitrary `adb` commands against your
selected device, view formatted terminal output and exit codes, and save
frequently used commands as one-click shortcut chips:
1. In **Device Manager** , locate the **ADB Commands** card.
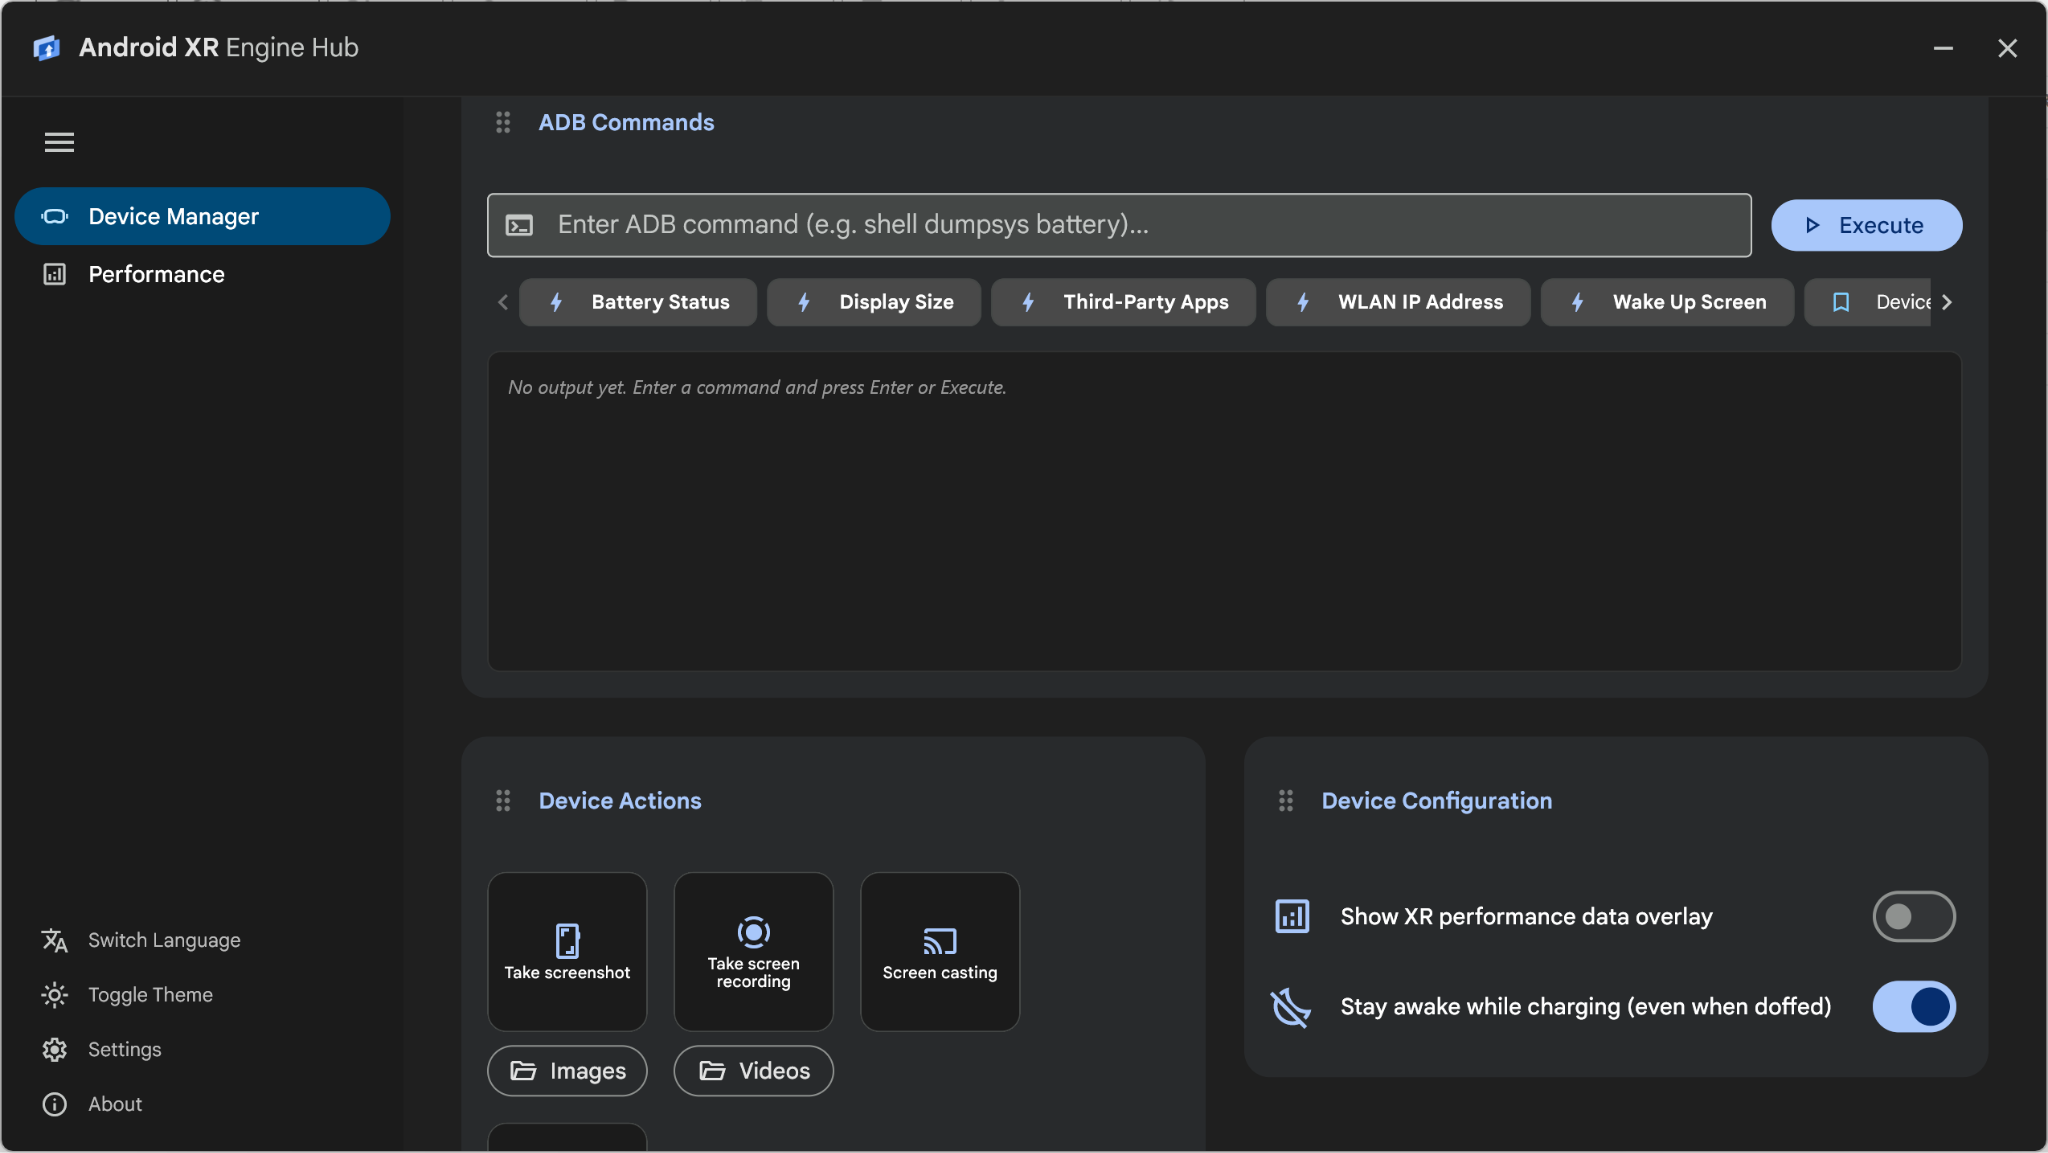
2. Run a command using either a preset chip or the command input field:
- **Built-in presets** : Click any of the built-in shortcut chips to run common diagnostics immediately:
- **Battery Status** : Runs `shell dumpsys battery`
- **Display Size** : Runs `shell wm size`
- **Third-Party Apps** : Runs `shell pm list packages -3`
- **WLAN IP Address** : Runs `shell ip addr show wlan0`
- **Wake Up Screen** : Runs `shell input keyevent 224`
- **Custom command** : Enter an ADB command (without the leading `adb` binary name, such as `shell dumpsys package com.example.xrapp`) in the input field and click **Execute** (or press Enter).
3. Inspect the **Exit Code** , execution duration, and command output in the
results pane. You can click **Copy output** or **Clear output** in the top
right of the output pane.
4. To save a custom command as a reusable chip (up to 10 shortcuts), enter the
command in the input field, click the bookmark icon (**Save command as
shortcut** ), enter a **Shortcut Name** in the **Save ADB Command Shortcut**
dialog, and click **Save**.
## Filter device logs and save shortcuts
The **Device Logs** card streams real-time logcat messages from your connected
Android XR device:
- **Filter logs** : Enter a keyword or log tag (for example, `Unity` or `OpenXR`) in the **Filter logs...** search field and press Enter to filter log messages.
- **Save filter shortcuts** : Click the bookmark icon (**Save filter
shortcut** ) in the search bar to open the **Save Log Shortcut** dialog and save your current filter query as a clickable shortcut chip (up to 10 shortcuts) below the search bar.
- **Standalone window** : Click the pop-out icon in the **Device Logs** card to open the log viewer in a separate, resizable desktop window for multi-monitor setups.
## Configure device settings and capture media
Use the **Device Configuration** and **Device Actions** cards in **Device
Manager** to control runtime device behavior and capture media during testing:
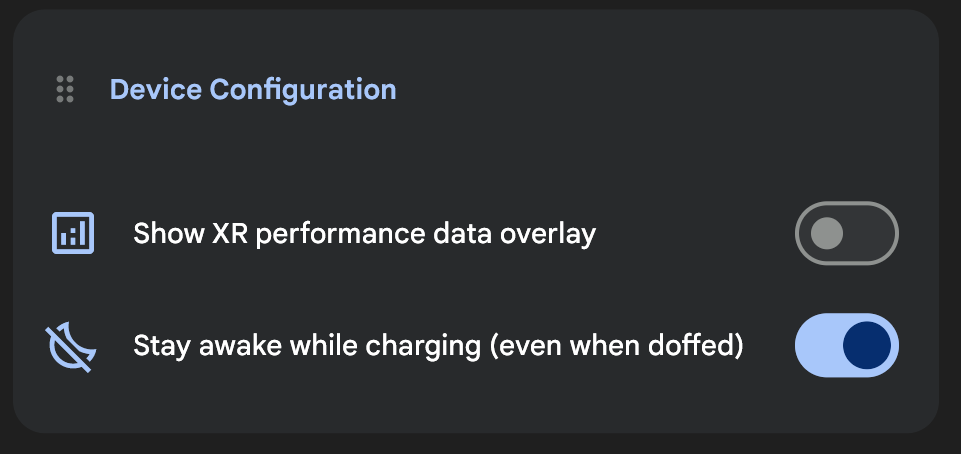
- **Show XR performance data overlay** : Toggle this setting in the **Device
Configuration** card to display or hide real-time on-device performance metric overlays.
- **Stay awake while charging (even when doffed)** : Toggle this setting in the **Device Configuration** card to keep your Android XR device awake while it's plugged in, even when you take the headset off between test runs.
- **Screen casting** : Click **Screen casting** in the **Device Actions** card to mirror your Android XR device display in a low-latency desktop window.
- **Take screenshot** and **Take screen recording** : Click **Take screenshot** or **Take screen recording** (which changes to **Recording screen** while active) in the **Device Actions** card to capture images or video from your device display and automatically open the saved file on your workstation. Click **Images** or **Videos** to open the local output folders.