Enabling users to physically drag components across a screen is fundamental to
modern Android apps. Whether you're building a custom slider, a swipe-to-dismiss
component, or an interactive canvas, Jetpack Compose provides a comprehensive
set of APIs to easily handle drag events.
The Compose dragging APIs abstract away the complexity of raw touch events.
Instead of manually calculating touch coordinates and managing gesture
lifecycles with [`pointerInput`](https://developer.android.com/reference/kotlin/androidx/compose/ui/input/pointer/package-summary.md.txt#(androidx.compose.ui.Modifier).pointerInput(kotlin.Any,kotlin.Any,kotlin.coroutines.SuspendFunction1)), you can use built-in modifiers that tie
directly into Compose's state management and animation systems.
This page describes how and when to use each dragging API.
## Choose the correct dragging API
There are several APIs you can use for implementing draggable content.
- **Choose standard Material components (like** [**`SwipeToDismissBox`**](https://developer.android.com/reference/kotlin/androidx/compose/material3/SwipeToDismissBox.composable.md.txt) **or navigation drawers) when**: You need default Material 3 swipe or drag behavior (for example, deleting an email, archiving a task, or opening a side menu / bottom sheets). They provide built-in behaviors without requiring custom state or layout management.
- **Choose** [**`Modifier.draggable`**](https://developer.android.com/reference/kotlin/androidx/compose/foundation/gestures/draggable.modifier) **when** : You only need raw drag deltas (for example, dragging a custom slider). For more information, see [Drag along a single axis with draggable](https://developer.android.com/develop/ui/compose/touch-input/pointer-input/drag-composables.md.txt#draggable).
- **Choose** [**`Modifier.draggable2D`**](https://developer.android.com/reference/kotlin/androidx/compose/ui/Modifier.md.txt#(androidx.compose.ui.Modifier).draggable2D(androidx.compose.foundation.gestures.Draggable2DState,kotlin.Boolean,androidx.compose.foundation.interaction.MutableInteractionSource,kotlin.Boolean,kotlin.Function1,kotlin.Function1,kotlin.Boolean)) **when** : You need a component to move continuously across both the X and Y axes simultaneously (for example, panning across a map or creating a floating action button that the user can drag anywhere on the screen). For more information, see [Drag in two dimensions with `Modifier.draggable2D`](https://developer.android.com/develop/ui/compose/touch-input/pointer-input/drag-composables.md.txt#modifier-draggable2d).
- **Choose** [**`Modifier.anchoredDraggable`**](https://developer.android.com/reference/kotlin/androidx/compose/foundation/gestures/anchoredDraggable.modifier.md.txt) **when** : You're building custom interactive components that need to snap between two or more discrete positions (for example, a bottom sheet, a navigation drawer, or a swipe-to-reveal action). For more information, see [Drag components between
anchor points with `anchoredDraggable`](https://developer.android.com/develop/ui/compose/touch-input/pointer-input/drag-composables#anchoredDraggable).
## Drag along a single axis with `draggable`
The [`draggable`](https://developer.android.com/reference/kotlin/androidx/compose/foundation/gestures/draggable.modifier#(androidx.compose.ui.Modifier).draggable(androidx.compose.foundation.gestures.DraggableState,androidx.compose.foundation.gestures.Orientation,kotlin.Boolean,androidx.compose.foundation.interaction.MutableInteractionSource,kotlin.Boolean,kotlin.coroutines.SuspendFunction2,kotlin.coroutines.SuspendFunction2,kotlin.Boolean)) modifier is the high-level entry point to drag gestures in
a single orientation, and reports the drag distance in pixels.
It's important to note that this modifier is similar to `scrollable`, in that it
only detects the gesture. You need to hold the state and represent it on screen
by, for example, moving the element via the [`offset`](https://developer.android.com/reference/kotlin/androidx/compose/foundation/layout/package-summary.md.txt#(androidx.compose.ui.Modifier).offset(androidx.compose.ui.unit.Dp,%20androidx.compose.ui.unit.Dp)) modifier:
```kotlin
@Composable
private fun DraggableText() {
var offsetX by remember { mutableFloatStateOf(0f) }
Text(
modifier = Modifier
.offset { IntOffset(offsetX.roundToInt(), 0) }
.draggable(
orientation = Orientation.Horizontal,
state = rememberDraggableState { delta ->
offsetX += delta
}
),
text = "Drag me!"
)
}
```
If you need to control the whole dragging gesture, consider using the drag
gesture detector instead, via the [`pointerInput`](https://developer.android.com/reference/kotlin/androidx/compose/ui/input/pointer/package-summary.md.txt#(androidx.compose.ui.Modifier).pointerInput(kotlin.Any,kotlin.coroutines.SuspendFunction1)) modifier.
```kotlin
@Composable
private fun DraggableTextLowLevel() {
Box(modifier = Modifier.fillMaxSize()) {
var offsetX by remember { mutableFloatStateOf(0f) }
var offsetY by remember { mutableFloatStateOf(0f) }
Box(
Modifier
.offset { IntOffset(offsetX.roundToInt(), offsetY.roundToInt()) }
.background(Color.Blue)
.size(50.dp)
.pointerInput(Unit) {
detectDragGestures { change, dragAmount ->
change.consume()
offsetX += dragAmount.x
offsetY += dragAmount.y
}
}
)
}
}
```
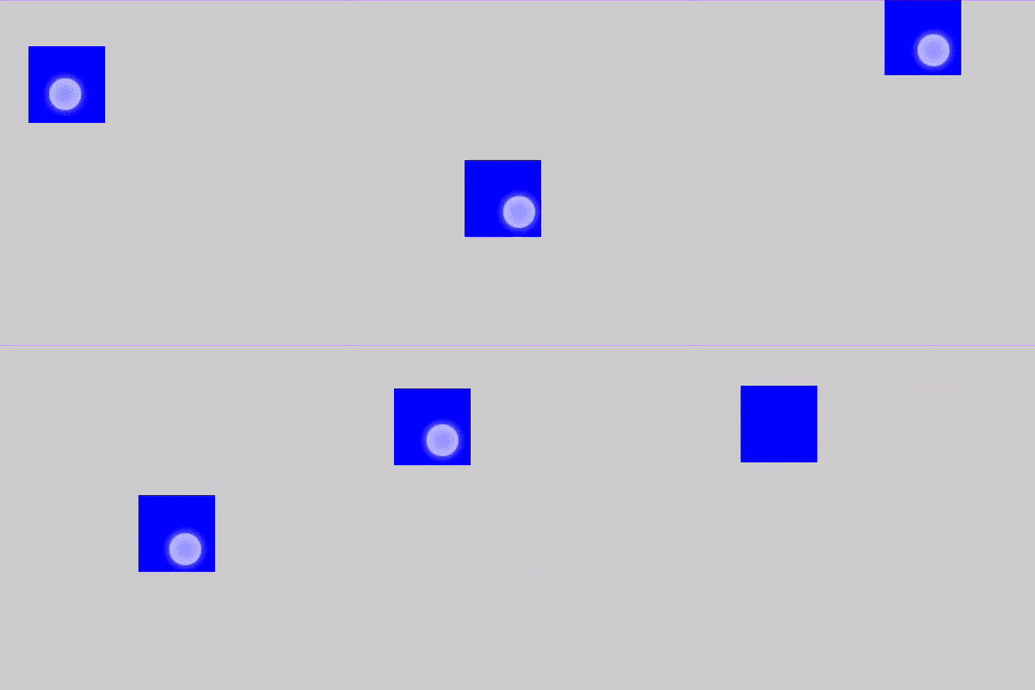 **Figure 1.** A UI element being dragged by a finger
## Drag components between anchor points with `anchoredDraggable`
The [`anchoredDraggable`](https://developer.android.com/reference/kotlin/androidx/compose/foundation/gestures/anchoredDraggable.modifier.md.txt) modifier lets you drag a component between a set of
predefined positions called anchor points. When the user releases the drag
gesture, the component settles at the closest anchor. `anchoredDraggable` is
useful for creating components like custom bottom sheets, complex sliders, or
drawer panels.
### API surface
The `AnchoredDraggable` API consists of the following main parts:
- **Anchors** (`DraggableAnchors`): A builder that defines the mapping between your custom states (e.g., an enum class for `Start, Center, End`) and their corresponding pixel offset values.
- **State** (`AnchoredDraggableState`): A state holder that manages the component's current position (offset), the anchor it's settled at, and its drag progress. It should be created using `rememberSaveable` and `AnchoredDraggableState.Saver` to preserve its state across configuration changes.
- **Gesture modifier** (`Modifier.anchoredDraggable`): A modifier that detects drag gestures along an `Orientation`, updates the state with the drag delta, and handles the fling gesture to animate the component to the nearest anchor upon release.
### Example: Build a custom `SwipeToDismiss` component
This example demonstrates how to build a custom `SwipeToDismiss` component (a
white banner) that the user can swipe left to dismiss, or drag to the right to
see an overscroll stretch effect.
1. **Define anchor values**. Define an enum representing the discrete positions
the draggable content can settle into:
```kotlin
private enum class AnchoredDraggableSwipeDismissValue { DismissedStart, Resting }
```
2. **Instantiate and save `AnchoredDraggableState`** . Use `rememberSaveable`
with `AnchoredDraggableState.Saver()` to persist the component's current
position across activity recreation and configuration changes (e.g., screen
rotation or theme changes):
```kotlin
val state =
rememberSaveable(saver = AnchoredDraggableState.Saver()) {
AnchoredDraggableState(initialValue = AnchoredDraggableSwipeDismissValue.Resting)
}
```
3. **Apply the `layout`, `offset`, and `draggable` modifiers**. To make the
component draggable and ensure its anchor points adapt to its size, apply the
following modifiers to the content that should visually move:
- **`Modifier.layout`** : Anchor positions often depend on a component's size, which isn't known during initial composition. Use the `layout` modifier to measure the component, calculate the `DraggableAnchors` map dynamically based on its width, and update the state using `state.updateAnchors()`.
> [!NOTE]
> **Note:** Although `Modifier.layout` is generally recommended, you can also use [`Modifier.onSizeChanged`](https://developer.android.com/reference/kotlin/androidx/compose/ui/Modifier.md.txt#(androidx.compose.ui.Modifier).onSizeChanged(kotlin.Function1)) to get the component's size in the following situations:
> - Your initial anchor is size-independent (e.g., `0f`).
> - You want to observe the size without needing to measure and place the component. `Modifier.layout` requires you to manually intercept the measurement phase and dictate placement.
- **`Modifier.anchoredDraggable`** : Connects to the state, dispatches drag deltas in the specified orientation, and handles the fling gesture to animate the component to the nearest anchor when released. Add this modifier to the component that should respond to drag gestures and pass it the `state` and drag `orientation` (and, optionally, `overscrollEffect`).
- **`Modifier.offset`** : Reads the offset from `state.requireOffset()` inside the offset lambda. Reading the offset within this lambda ensures the value is only read during the placement phase, avoiding unnecessary recompositions during the drag. Apply this modifier to the content that should visually move.
```kotlin
Box(
modifier = Modifier
.fillMaxWidth()
// Read state.requireOffset() inside the offset lambda to defer reading to the placement phase
.offset { IntOffset(state.requireOffset().roundToInt(), 0) }
.layout { measurable, constraints ->
val placeable = measurable.measure(constraints)
val anchors = DraggableAnchors {
AnchoredDraggableSwipeDismissValue.DismissedStart at -placeable.width.toFloat()
AnchoredDraggableSwipeDismissValue.Resting at 0f
}
state.updateAnchors(anchors)
layout(placeable.width, placeable.height) { placeable.placeRelative(0, 0) }
}
// Pass overscrollEffect to anchoredDraggable so deltas beyond the bounds (min and max anchor) are dispatched to overscrollEffect, and render the visual effect with Modifier.overscroll.
.overscroll(overscrollEffect)
.anchoredDraggable(
state,
Orientation.Horizontal,
overscrollEffect = overscrollEffect
)
) {
dismissContent()
}
```
4. \[Optional\] **Integrate overscroll** . The [`overscrollEffect`](https://developer.android.com/reference/kotlin/androidx/compose/foundation/OverscrollEffect.md.txt) API
implements a visual effect that displays when the edges of a scrolling
container have been reached with a scroll or fling. You can provide visual
feedback when a user drags past the defined anchor bounds with an overscroll
effect (typically a stretch or glow).
1. **Dispatch** : Pass an `overscrollEffect` instance to the `anchoredDraggable` modifier. This dispatches drag deltas to either the `AnchoredDraggable` state or the overscroll effect, depending on whether the gesture is inside or outside the anchor bounds.
2. **Render** : Apply the [`Modifier.overscroll`](https://developer.android.com/reference/kotlin/androidx/compose/ui/Modifier.md.txt#(androidx.compose.ui.Modifier).overscroll(androidx.compose.foundation.OverscrollEffect)) with the same `OverscrollEffect` instance to the component that should visually render the effect.
The following snippet shows how to add a standard stretch effect:
```kotlin
val overscrollEffect = rememberOverscrollEffect()
Box(
modifier.fillMaxWidth()
) {
Box(Modifier.fillMaxWidth()) {
background()
}
Box(
modifier = Modifier
.fillMaxWidth()
// Read state.requireOffset() inside the offset lambda to defer reading to the placement phase
.offset { IntOffset(state.requireOffset().roundToInt(), 0) }
.layout { measurable, constraints ->
val placeable = measurable.measure(constraints)
val anchors = DraggableAnchors {
AnchoredDraggableSwipeDismissValue.DismissedStart at -placeable.width.toFloat()
AnchoredDraggableSwipeDismissValue.Resting at 0f
}
state.updateAnchors(anchors)
layout(placeable.width, placeable.height) { placeable.placeRelative(0, 0) }
}
// Pass overscrollEffect to anchoredDraggable so deltas beyond the bounds (min and max anchor) are dispatched to overscrollEffect, and render the visual effect with Modifier.overscroll.
.overscroll(overscrollEffect)
.anchoredDraggable(
state,
Orientation.Horizontal,
overscrollEffect = overscrollEffect
)
) {
dismissContent()
}
}
```
### Result
The preceding code snippet results in a white banner, with the text "Drag me to
dismiss!", that the user can swipe left to dismiss (or drag right to see the
overscroll stretch effect):
**Video 2.** A custom swipe-to-dismiss component implementation.
### Example: Create custom, gesture-driven navigation drawer
This example demonstrates how to build a custom, gesture-driven navigation
drawer. As the user drags horizontally, the foreground screen (`ScreenContents`)
slides to the right, scales down from `1.0f` to `0.8f`, and rounds its corners
to reveal the underlying navigation drawer.
1. **Define anchor states and positions** . In this example, the anchors are the
opened and closed states of the drawer. Define an enum for the `Open` and
`Closed` states, and map them to pixel offsets using `DraggableAnchors`:
```kotlin
enum class DrawerState {
Open,
Closed
}
val anchors = DraggableAnchors {
DrawerState.Open at drawerWidth
DrawerState.Closed at 0f
}
val state = remember {
AnchoredDraggableState(
initialValue = DrawerState.Closed,
anchors = anchors,
)
}
```
2. **Animate `anchoredDraggableState` on the click of an item** . Place
`HomeScreenDrawer` at the bottom of the `Box` and `ScreenContents` on top. The
drawer remains stationary, while the top layer translates and scales over it.
When a user selects a drawer item, update the active screen state and
automatically dismiss the drawer using `state.animateTo(DrawerState.Closed)`:
```kotlin
@Composable
private fun AnchoredDraggableDrawerOnClickSample(
modifier: Modifier = Modifier,
state: AnchoredDraggableState,
coroutineScope: CoroutineScope
) {
var screenState by remember { mutableStateOf(ScreenState.Home) }
Box(modifier = modifier.fillMaxSize()) {
HomeScreenDrawer(
selectedScreen = screenState,
onScreenSelected = { screen ->
screenState = screen
// Dismiss drawer when a destination is selected
coroutineScope.launch { state.animateTo(DrawerState.Closed) }
}
)
// ScreenContents(...)
}
}
```
3. **Use `state.requireOffset()` to change multiple visual properties** .
Instead of only offsetting the content, you can change multiple properties
with [`Modifier.graphicsLayer`](https://developer.android.com/reference/kotlin/androidx/compose/ui/graphics/graphicsLayer.modifier.md.txt#(androidx.compose.ui.Modifier).graphicsLayer(kotlin.Function1)) to simultaneously animate translation,
scale, and corner radius based on the drag progress:
- Use `state.requireOffset()` to get the current drag offset.
- Use `lerp()` (linear interpolation) to calculate proportional scale (`1f` to `0.8f`) and corner radius (`0.dp` to `32.dp`) relative to the offset and drawer width.
- `Modifier.graphicsLayer` executes changes in the draw phase, ensuring high-performance animations without triggering recompositions during the drag.
```kotlin
@Composable
private fun AnchoredDraggableDrawerGraphicsLayerSample(
state: AnchoredDraggableState,
drawerWidth: Float,
selectedScreen: ScreenState,
onDrawerClicked: () -> Unit
) {
ScreenContents(
selectedScreen = selectedScreen,
onDrawerClicked = onDrawerClicked,
modifier = Modifier
.graphicsLayer {
this.translationX = state.requireOffset()
val scale = lerp(1f, 0.8f, state.requireOffset() / drawerWidth)
this.scaleX = scale
this.scaleY = scale
val cornerRadius = lerp(0f, 32f, state.requireOffset() / drawerWidth)
this.shape = RoundedCornerShape(cornerRadius.dp)
this.clip = true
}
.anchoredDraggable(state, Orientation.Horizontal)
)
}
```
4. **Trigger programmatic animations with `animateTo`** . Control the drawer
programmatically (such as when tapping the menu icon or selecting a drawer
item) by launching `state.animateTo()` within a coroutine scope:
```kotlin
fun toggleDrawerState(
state: AnchoredDraggableState,
coroutineScope: CoroutineScope
) {
coroutineScope.launch {
if (state.currentValue == DrawerState.Open) {
state.animateTo(DrawerState.Closed)
} else {
state.animateTo(DrawerState.Open)
}
}
}
```
### Result
**Video 3.** The foreground screen (Sleep) is dragged to the right, showing the underlying navigation drawer.
## Drag in two dimensions with `Modifier.draggable2D`
Use the `draggable2D` modifier for moving individual UI elements across both
the X and Y axes simultaneously.
### Drag a composable element
This example shows the most common use case for `draggable2D` --- allowing a user
to pick up a UI element and reposition it anywhere within a parent container.
> [!NOTE]
> **Note:** `draggable2D` shouldn't be confused with the [Drag and Drop](https://developer.android.com/develop/ui/compose/touch-input/user-interactions/drag-and-drop.md.txt) pattern. The `dragAndDropSource` modifier is for use with transferring data (URIs, text) between applications, whereas `draggable2D` is for within the same composable hierarchy.
```kotlin
@Composable
private fun DraggableComposableElement() {
// 1. Track the position of the floating window
var offset by remember { mutableStateOf(Offset.Zero) }
Box(modifier = Modifier.fillMaxSize().background(Color(0xFFF5F5F5))) {
Box(
modifier = Modifier
// 2. Apply the offset to the box's position
.offset { IntOffset(offset.x.roundToInt(), offset.y.roundToInt()) }
// ...
// 3. Attach the 2D drag logic
.draggable2D(
state = rememberDraggable2DState { delta ->
// 4. Update the position based on the movement delta
offset += delta
}
),
contentAlignment = Alignment.Center
) {
Text("Video Preview", color = Color.White, fontSize = 12.sp)
}
}
}
```
**Video 4.** A small purple box being repositioned on a gray background, demonstrating direct 2D dragging where the element stops moving the instant the user's finger is lifted.
The preceding code snippet includes the following:
- Tracks the box's position using an `offset` state.
- Uses `offset` modifier to shift the component's position based on the drag deltas.
- Since there is no fling support, the box stops moving the instant the user lifts their finger.
### Drag a child composable based on parent's drag area
This example demonstrates how to use `draggable2D` to create a 2D input area
where a selector knob is constrained within a specific surface. Unlike the
draggable element example, which moves the component itself, this implementation
uses the 2D deltas to move a child composable "selector" across a color picker:
```kotlin
@Composable
private fun ExampleColorSelector(
// ...
) {
// 1. Maintain the 2D position of the selector in state.
var selectorOffset by remember { mutableStateOf(Offset.Zero) }
// 2. Track the size of the background container.
var containerSize by remember { mutableStateOf(IntSize.Zero) }
Box(
modifier = Modifier
.size(300.dp, 200.dp)
// Capture the actual pixel dimensions of the container when it's laid out.
.onSizeChanged { containerSize = it }
.clip(RoundedCornerShape(12.dp))
.background(
brush = remember(hue) {
// Create a simple gradient representing Saturation and Value for the given Hue.
Brush.linearGradient(listOf(Color.White, Color.hsv(hue, 1f, 1f)))
}
)
) {
Box(
modifier = Modifier
.size(24.dp)
.graphicsLayer {
// Center the selector on the finger by subtracting half its size.
translationX = selectorOffset.x - (24.dp.toPx() / 2)
translationY = selectorOffset.y - (24.dp.toPx() / 2)
}
// ...
// 3. Configure 2D touch dragging.
.draggable2D(
state = rememberDraggable2DState { delta ->
// 4. Calculate the new position and clamp it to the container bounds
val newX = (selectorOffset.x + delta.x)
.coerceIn(0f, containerSize.width.toFloat())
val newY = (selectorOffset.y + delta.y)
.coerceIn(0f, containerSize.height.toFloat())
selectorOffset = Offset(newX, newY)
}
)
)
}
}
```
**Video 5.**A color gradient with a white circular selector knob that can be dragged in any direction, demonstrating how 2D deltas are clamped to the container's boundaries to update selected color values.
The preceding snippet includes the following:
- It uses the `onSizeChanged` modifier to capture the actual dimensions of the gradient container. The selector knows exactly where the edges are.
- Inside the `graphicsLayer`, it adjusts the `translationX` and `translationY` to make sure the selector stays centered while dragging.
## Recommended for you
- Note: link text is displayed when JavaScript is off
- [Understand gestures](https://developer.android.com/develop/ui/compose/touch-input/pointer-input/understand-gestures.md.txt)
- [Advanced animation example: Gestures {:#gesture-and-animation}](https://developer.android.com/develop/ui/compose/animation/advanced.md.txt)
- [Value-based animations](https://developer.android.com/develop/ui/compose/animation/value-based.md.txt)